
Three-dimensional scanning is a powerful tool to incorporate existing designs, which allows designers and engineers to ensure that the design process is precise and more efficient, especially when there is no CAD model available.
3D scanner helps the product development of bikes
Recently, a well-known Czech bike producer LeaderFox started capturing 3D data for the development of new bike models using Scantech’s 3D scanner KSCAN-Magic.
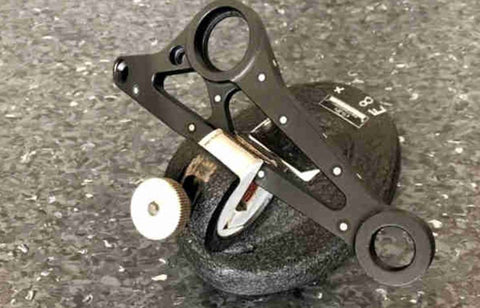
The project is aimed at preparing 3D data for the development of a new bike model, specifically the connecting element of a cross-country bike.
This element is used to connect the rear shock absorber and the rear structure wheels, attached to the seat tube. The design intent is to increase the riding comfort of the cyclist.
How to capture a 3D model for product development
Step 1: Marker placement
The time needed: 1 minute
Since we will be using a portable laser 3D scanner, we need first to place markers (reference points). There are two different sizes of makers in each package: 3 mm and 6 mm, respectively. Because we were scanning a relatively small part, we decided to use the smaller diameter and placed markers with the golden rule that at least 4 markers must be visible for a 3D scanner in the scanning field.
Step 2: Preparation and scanning with KSCAN Magic
The Time needed: 30 minutes
We first calibrated the 3D scanner with a calibration board and then started to scan. Scanning itself with a portable laser 3D scanner is a very fast process. The scanner must be moved so that data is scanned from multiple angles, for their completeness. Once the data is complete, the object is placed in the next position or more positions to scan the remaining parts.
In this case, we used small reference points (3 mm) also on sides so we could move smoothly from the top side of the part to the bottom.
Step 3: Data post-processing in the scanning software
The time needed: 10 minutes
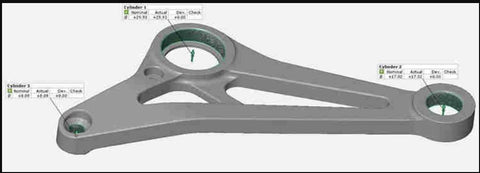
After scanning, the data is cleaned in our scanning software “ScanView.” All scanned data is then joined and then a check of the quality of the data and their completeness is recommended.
The last step is to generate the resulting 3D model. The result can be exported to common output mesh formats such as *.stl, *.ply, or to point cloud files such as .asc, .igs or, .txt.
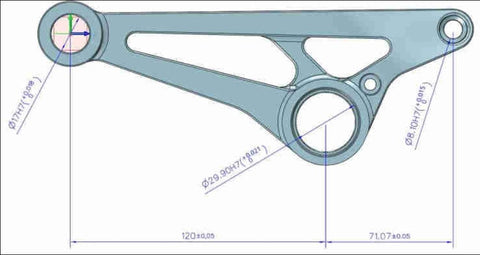
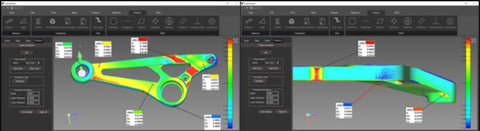
Step 4: Measurement and reporting in the scanning software
The time needed: 15 minutes
The scanning and measuring software ScanView, which is included with KSCAN Magic, can directly perform CAD file comparison and generate a color map with a deviation report, which can be saved into PDF file.
For more information, please read 3d-scantech.